The Ultimate Guide to Grow Bags
You may have heard of grow bags, but not know what they are or how best to use (or choose) one. So in this in-depth guide from South West Greenhouses, we're going to give you everything we know about grow bags! Read on.
What is a Grow Bag?
A grow bag (or growbag) is a planter made from plastic or fabric, filled with a growing medium, and used to grow plants such as tomatoes or other salad plants. They usually contain a mixture of growing mediums, such as peat and compost. They usually contain enough nutrients for one season of growing, making them more practical than growers having to sterilize their soil after each growing season.
Are Grow Bags Cost-Effective?
Although grow bags vary in price depending on the size, quality and material they are made from they are all relatively low cost.
Grow bags can be made from plastic or fabric. Plastic grow bags are less environmentally friendly and don’t last as long as the fabric ones, but they are the cheapest.
Some of the several advantages of grow bags over traditional pots and containers include the following:
- They are cheaper than traditional containers: When you contrast the two types of containers grow bags are almost always less expensive especially when you consider how many plants you can fit in a garden pot as compared to a grow bag.
- They are much less space-consuming: If you have a smaller space in which to grow garden bags are the way to go. When considering storage in the off-season remember that grow bags can be stored completely flat, taking up virtually no space at all.
- They won’t break: Unlike traditional clay flowerpots grow bags are extremely durable; you will not have to worry about them breaking even if you drop them or toss them around.
- They are much easier and cheaper to transport: Rigid flowerpots are often expensive and fragile to ship, but transporting grow bags is a piece of cake. You can easily ship grow bags to and from anywhere in the world.
Which Plants are Best for Grow Bags?
I wouldn’t hesitate to recommend growing any plant in a large enough grow bag. However, plants that do not have deep roots are much easier to grow in a grow bag.
Some of the easiest plants to grow in a grow bag are:
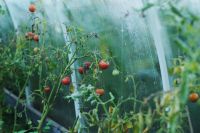
- Tomatoes (of all kinds)
- Peppers (both hot and sweet)
- Zucchini
- Summer squash
- All varieties of eggplant
- All varieties of cucumbers
- Lettuce
- Endive
- Arugula and other salad greens
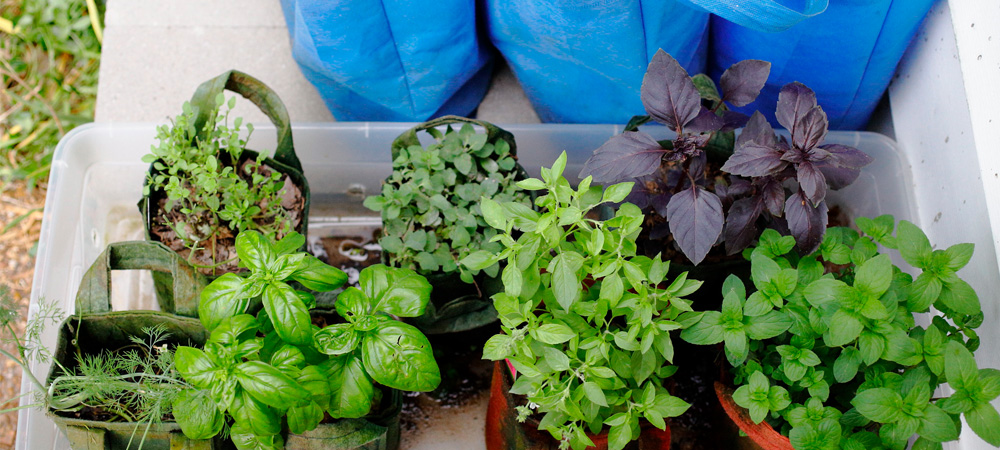
- Herbs
- Potatoes
- All types of flowers
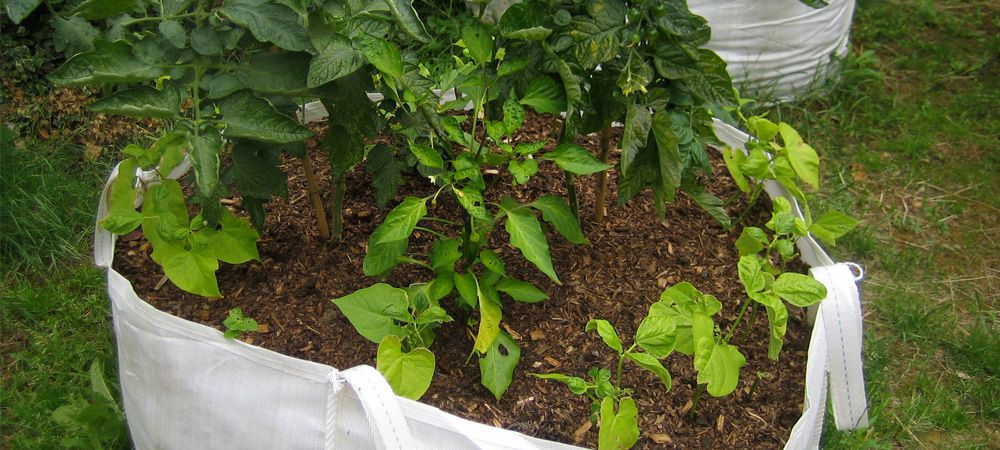
There are several ways you can plant in a grow bag depending on your preference. Multiple plants can be grown in the same bag if the bag is large enough. The side of the bag can even be cut open, allowing you to plant in rows. A grow bag also allows a gardener to plant vertically.
How to Use a Grow Bag
If your greenhouse is on the small side grow bags may be the perfect answer. You don’t need much space at all to grow vegetables, herbs and even flowers if you are growing in a grow bag. Another advantage is that your grow bag can be easily relocated if needed.
As long as you have sufficient sunlight you can hang or place your grow bag pretty much anywhere. Grow bags are easy to use but there are a few important tips and tricks. For achieving the absolute best results with your grow bag keep reading! I will break down the most successful practices when planting in a grow bag.
Best Soil for Grow Bags
There are a few different mixtures people like to use for their grow bags but this is one of the most commonly used:
- 1/3 peat moss or coco coir
- 1/3 compost or potting mix
- 1/3 vermiculite or perlite
- Add mulch or wood chips on top of your soil mixture
Retaining moisture is one of the issues some people have when planting in grow bags and this mixture will solve that problem for you. Adding the mulch or wood chips on top is an extra step that will work to prevent your soil mixture from drying out.
Here is another popular soil mixture. This is a modified version of the 5-1-1 blend:
- 5 parts pine or fir bark fines (try Soil Pep from Home Depot)
- 1 part coco coir or peat moss
- 1 part Fuller’s earth (Turface, oil absorbent)
- 1 part perlite
Some plants, such as potted citrus trees prefer a soil that is drier. In this case, I suggest a mixture that includes poultry grit, Fullers earth-screen and pine or fir bark fines in equal parts.
Best Size for Grow Bags
The correct sized bag is essential to successfully grow plants in grow bags. It is fairly easy to find any size of grow bag these days, from 3-gallon bags for your single plants up to (believe it or not) 100-gallon bags! Here is a simple and basic guide to help you choose the right size grow bag:
- 3-Gallon Bags – If you want to plant one or two smaller plants such as pepper plants the 3-gallon bag will be exactly what you need.
- 5-Gallon Bags – For a big majority of your planting needs the five-gallon bags will be perfect. You can use this size of bag for virtually any plants from potatoes to small trees.
- 10-Gallon Bags – if you are hoping to grow several plants consider using the extra-large ten gallon grow bag. This size of bag is used for people that have ample space. You can grow numerous potato plants or a variety of salad greens in this bag.
- 100-Gallon Bags – This gigantic grow bag might seem excessive to some, but it is perfect for those who want to create a big garden and grow a multitude of plants.
It is wise to take both the size of the bag and the type of plants you want to grow into consideration before purchasing your grow bags. Bags are often designed with a specific type of plant in mind, for instance, some grow bags come with side openings so that harvesting your potatoes is a breeze. The material your bag is made from is another important consideration. Fabric bags can be great for certain fruits. Some grow bags even make planting in a stacked formation easier because they include side pockets.
Watering Grow Bags
Even if you use the perfect soil mixture your grow bags will get dry fairly quickly and it will be essential to water them regularly. Grow bags often have really effective drainage and you will find that you have to water your grow bag more often than you would water plants growing in a pot. Many people find it beneficial to set up a worry-free system for watering their grow bag.
Some of the most popular watering systems are explained here:
Drip System
For a simple way to ensure your plants are consistently getting enough water many people add a pipe drip system to their grow bags. A drip system requires a simple installation and you won’t ever have to worry about your grow bags drying out.
Self-Watering Systems
This is probably the simplest system you can use to keep your plants hydrated. All you need to do is place a container filled with water directly under the grow bag. Ensure the plants are not submerged in the water, the roots will pull the water up as needed. All you need to do is keep an eye on the container and fill it up when it gets low. Easy-peasy!
Can You Re-Use Old Grow Bags?
One major reason people love to use grow bags is the ability to reuse them over and over. After removing plants, the soil is still full of moisture and nutrients so all you have to do is plant again! This ability to reuse grow bags is part of the reason they are so economical.
If you choose to store the bags after removing your plants simply add the nutrient-rich soil to your garden or flower beds. After cleaning and drying them, the bags can be laid flat or squished into a tiny space to store until the next time they are needed.
There are a couple of important factors to be aware of to make sure it is easy to reuse your grow bags. First of all, ensure the bags that you buy indicate on them that they are reusable. Fabric bags are most likely going to be reusable but plastic bags may not be. Secondly, make sure to remove the old soil and rinse your bag out thoroughly before storing it.
Grow bags will not last as long as a traditional ceramic flowerpot but you should be able to get three or four growing seasons out of one bag! This makes the cost of a grow bag minimal.
How to Make Your Own Grow Bags
If you enjoy DIY projects or you want to save a bit of money, consider making your own grow bags. Another advantage of making your own grow bags is that you can customize them to whatever size you like.
Believe it or not you can make your own grow bags for less than a dollar a bag! All it takes to make a durable grow bag is some landscaping fabric, nylon sewing thread and a minimal amount of skill with a needle and thread.
Here is a step-by-step guide to making your own grow bags:
Step 1 - Measure the Space
Measure your garden space to help you decide on the size of grow bag you want to make.
Step 2 - Measure & Cut the fabric
Measure your landscaping fabric and cut it out leaving an extra inch for the seam.
Step 3 - Stitch the bottom and sides
Fold the material and stitch up the bottom and sides with your nylon sewing thread. It should look like a large pocket at this point.
Step 4 - Pin the bottom
Fold and use a couple of pins to secure the bottom corners of the bag. Now the bottom should be more of a square shape and resemble a bag, rather than a pocket.
Step 5 - Stitch the corners
Use your needle and thread to stitch the corners of the bag.
Step 6 - Fold and add handle
Simply folding over the top will finish the bag nicely. It is suggested to add a sturdy handle to the top of the bag for easier transportation once it is filled with soil.
Step 7 - Hide handle seams (optional)
Flipping the bag inside out before adding the handle will hide any unsightly seams.
Conclusion & Further Reading
This has been our in-depth guide on grow bags, and you should now be well informed on which to choose and how to use them.
If you want to learn more, then we have a range of other related guides on our website, such as:
- Best Vegetables for a Greenhouse
- How to Grow Grapes in a Greenhouse
- Fit an Automatic Greenhouse Vent Opener
- Potting Shed FAQs
If you're interested in purchasing a new greenhouse, then South West Greenhouses is the best place in the UK to buy one. Browse our small greenhouses here, or our entire range here.
 Author: