How to Start An Allotment For Beginners
Allotments can mean a lot of things to different people. They can mean time alone and away from a busy job or family or social life, or they can mean a place to gather with like-minded people to sip tea in a shed and discuss the latest hybrids and pests and weather forecasts. They can mean fresh flowers at home each week, a stocked cold room of root vegetables an leafy greens… Whatever your personal dream for it, an allotment can really enrich your life.
Part of that enrichment comes in the form of work and patience. These might not seem so desirable at first, but they really do pay off – and then some!
How To Get An Allotment?
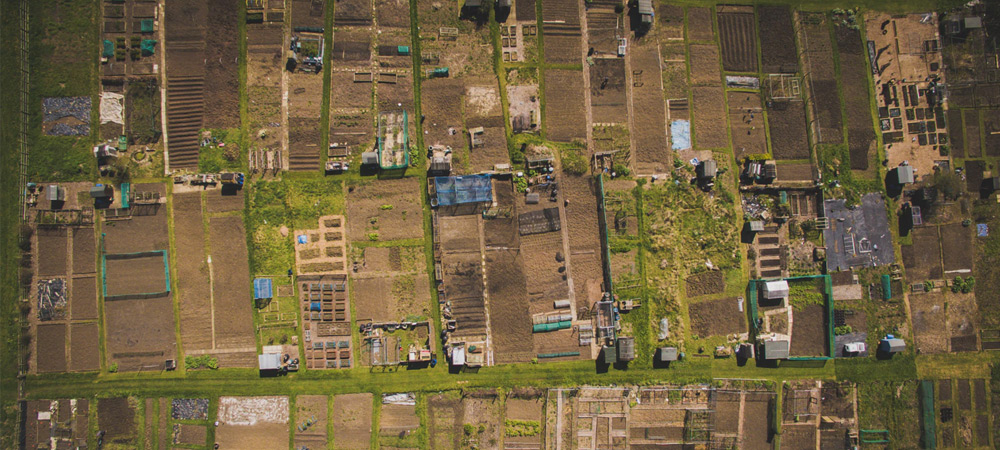
Some areas have a lot of allotments ready for people to tend them; other places have long-term waiting lists of people hoping to get one while they’re still young enough to do something with it. If you’re in the former category, you’ll have no worries. If you’re in the latter one, best to apply when the first inkling of desire tickles at you – you can always cancel later if you decided against it. Or, since the waiting list in extreme cases is up to twenty years, you can hang onto it and give it to your kids, or grand-kids.
Once you have one, you’ll know what kind of prep work you’re in for. Some will be clean and fertile and ready for planting. Others will be neglected and overgrown and even possibly strewn with rubbish. If the latter is the case, prep work becomes very important. In extreme cases, consider the first year your ‘clean up and prep’ year.
You can apply for an allotment here.
Clearing Out All of the Rubbish
Getting rid of rubbish like broken glass and metal fragments is best done with a many-toothed rake and perhaps even a soil sieve. More care at this stage will save you potential injury later, and will prevent you from having to wear too much protective clothing in the long term. In any case, wear thick gloves and sturdy protective footwear while clearing out rubbish.
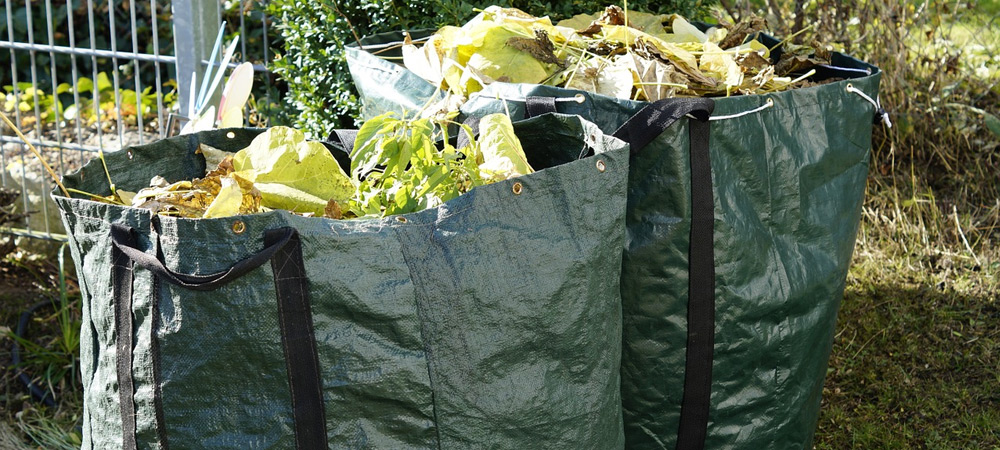
Trim Back Plants and Trees
Cutting back unwanted plants – or overgrown wanted plants – is best done with an array of varied tools. You’ll want a pair of good secateurs, loppers, a strimmer and a garden shredder for major jobs.
Start at one end and work methodically toward the other. This allows you to see clear progress and avoid becoming discouraged.
If you are in no kind of rush, and want to cut down on the amount of labour involved, laying down a layer of opaque plastic will starve weeds of light and moisture, and should kill most of them off over a growing season. Your job of cleaning up afterward will be made much easier.
You will, however, want to be mindful that there are other residents there, not just the plants. Hedgehogs, frogs, snakes, toads and a variety of other crawlies will be quite established in neglected plots. If you make plenty of noise while preparing to strim or use other equipment – or before you lay down plastic – it will give wildlife time to run away and find some other safe place to take up residence… probably in the next unused allotment.
If, while clearing the plant life, you spot perennials, from the previous allotment keeper, that you’d like to keep on, then pot them in some compost while you finish the cleaning up, and return them to their places afterward. You’ll not only get some free plants, but you’ll know that they are happy in their current position, because they survived the neglect before you got there.
Trim Turf With A Cutter
If the allotment site is new, or is at the edge of the allotment field, then you may have to contend with turf. Hiring or buying a turf cutter is the best way to take care of this in an easy, thorough manner. You can do it with a spade, but be ready for some significant effort.
Weeding and Clearing Away Stones
Once that’s done, rake and rummage through the soil to remove any remaining weeds or stones that could stunt the growth of your future crops. The more care you take at this stage, the better your efforts will pay off later on. This is also a great way to get younger gardeners involved, offering an incentive of some kind to get children involved.
Condition Your Soil
You may want to do the no-dig method, which entails covering the area in about 4 cm of organic matter (make sure there are no weeds under it, or they will come up). If you want to avoid paying for all of that organic material, and don’t mind the labour involved, you can turn the soil with a spade and/or fork and break it up a bit.
For long-neglected plots, you may want to do a double-dig the first year, delving to a depth of two spade-blades. A rotovator can make this job easier, but will still require a fairly firm hand on the machinery.
Fertiliser
Most soils will do better if you add some additional organic matter to them. Animal manure (often horse or chicken) can work well, or you can buy pellets or conditioning compost from a local garden centre. Fertiliser is a good idea too, but make sure not too overdo it.
How To Content With Lack of Water
Some allotments have a water butt or other water source close at hand, but many don’t. You can either have your own installed, carry jugs and buckets from your home – but this is a LOT of work, especially in hot summers with thirsty crops like tomatoes.
In any case, adding a layer of mulch to the surface of you allotment will help keep water in the soil for longer, allowing the plants time to soak it up as needed. An extra perk of this is that it keeps weeds down.
Organising Using Paths
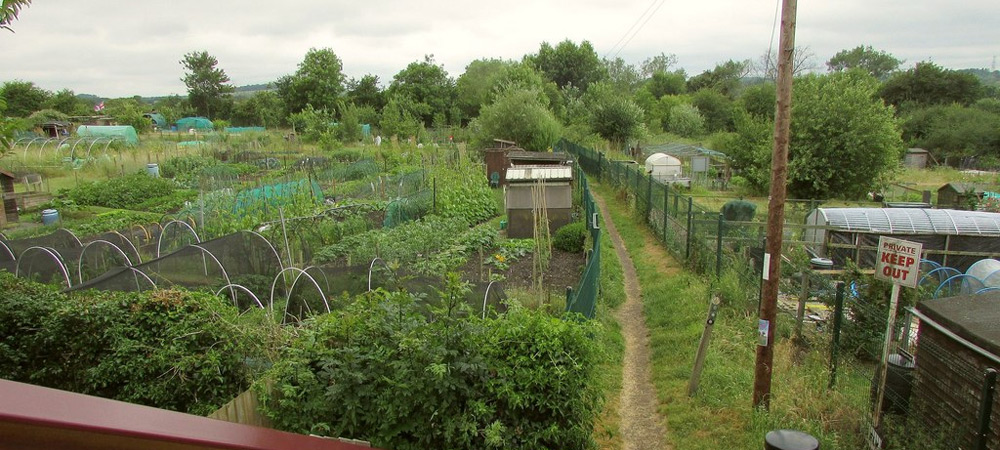
In the excitement of that first allotment, it may seem a waste to set any room aside for walking through the crops – but this is a must. Planning out how you will easily get to each plant for weeding, pruning, watering and general inspection is important. It also ensures that plants have enough room to grow, and access to sunshine, even for foliage lower down on the plants.
Raised beds are excellent ways to accomplish this. They have the added benefit of making crops easy to reach without bending or crouching, but they do require more water than ground-level crops and have the added cost and work of building them at the beginning.
The easiest option is laying a green path, a strip of turf, between each row. You can keep the edges trimmed and neat, and it will keep you from having to slog through mud to get to your crops. Weed-resistant membranes, wooden planks, or stepping stones (or tiles, or bricks) are also good options.
Get Planting!
Whew! That was a lot of work – but now you’re ready for the big moment. What you do next though, depends on the time of year.
Tasks & Plants Month by Month
Spring
This is usually the busiest time of the allotment year. Seeds will come up – both those you want and those you don’t – and care is needed to get plants growing as early as possible to give them the longest growing season – without them hitting a hard frost and getting killed off. One way to stretch the season without risking the frost is to germinate plants indoors first, then transplant them to the garden once it warms up a bit.
Once the frosts have passed and the soil begins to warm, it’s time. When this is, will vary with where you are, but your local garden centre will have some good advice for your area. In a general sense though, plant onions, shallots, potatoes, lettuce, radish, leeks and beetroot in March; then peas, carrots, parsnips, broccoli and cauliflower in April; and French beans, runner beams and spring onions in May.
Summer
During the warmest months, when things are growing the most, don’t be shy about picking some of the crop early. This not only gives you some early treasures for you plate at home, but also stimulates growth, so you get larger, healthier crops later on.
Keep up on your watering. Lack of water can kill plants, we all know that, but don’t underestimate the damage caused by stressing them. They may look like they’ve recovered nicely after your week away in Spain, but there could be serious damage done that only surfaces later – like loss of crops, or the development of a disease. Too little water can also cause some plants to go to seed.
The good news is, anything you didn’t plant earlier than June, can go in now.
Autumn
Watch the hard work pay off, collect your crops, and plant some winter crops to fill in the spaces from your spring and summer ones.
In September, hardy lettuces and spring onions can go in, along with cabbages. Broad beans planted in October will be up in early spring. Even planting in November – lettuce under a cover, or more broad beans – will yield a nice crop in spring.
The winter frost and increase in rain should kill off infections and help to condition the soil for the next year.
Winter
Ahhh, what is cold and dreary for non-allotment-holders is a time of hot tea and dreaming for you. Plan out your coming crops, and any changes you want to make to your allotment now that you are somewhat of a veteran.
Walk the plot regularly, harvesting any winter-growing crops you have in, when ready, and keeping an eye on any especially-busy weeds. If you’re really anxious to get started on the next year, you can plant dormant bushes and fruit trees in the winter. Don’t be alarmed when they don’t seem to do anything; they’re dormant, after all, and will wait for warmer weather to spring into life and growth. You can also buy some seed potatoes in February and place them on a windowsill to start chitting (sending shoots out).
Keep On Top Of Allotment Jobs
Regular Watering
Watering in an ongoing job, and increases with hotter weather. Even when there is intermittent rain, you may have to supplement it with regular watering, so keep an eye on the soil and on the condition of the plants. Don’t let them get stressed from dehydration.
Regular Weeding
Weeding is another regular job too. Weeds take nutrients and moisture away from the plants you do want growing there, so removing them is a great help to gaining the bumper crop of your daydreams.
Weed on dry days – they’re less likely to simply re-root.
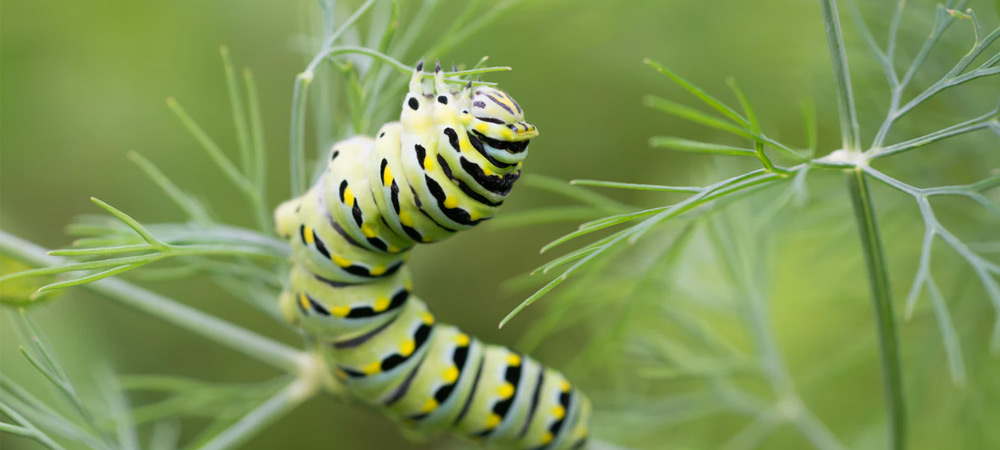
Pesky Pests!
There are others that look forward to your crops each year, and I’m not talking about allotment neighbours; many insects and other pests look forward to the various stages of growth too, and they can really damage your crop’s potential. Aphids, birds and caterpillars are among the chief culprits, but there are others too.
The easiest way to get rid of them is to spray chemicals – but this also can have negative effects. Not only is it harmful to the general environment, but it can also lace your food with toxins, and kill off beneficial wildlife in and around your allotment.
If, therefore, you choose to employ organic methods, you’ll need some tips. Aphids don’t like citrus, so soaking citrus peel in water can shoo them away. Caterpillars are big enough to pick by hand. Many flying insects don’t like the smell of marigolds, and so planting these around the edges of your allotment can deter them from your area. Remember, you don’t have to make your allotment pest-proof, you just have to make it less attractive to them than some other location. To keep birds off of your bushes, cover them in a net. If your net goes right to the ground, make sure you don’t have any hedgehogs or other beneficial creatures hiding in there when you do it.
By going organic, you’ll keep the bees, butterflies, and other pollinating insects that not only make your crops produce better, but they make working in your allotment a lot more pleasant too.
Fertilising
Keeping a compost bin on your allotment is a cheap way to keep your soil nutrient-rich, and to get rid of household food waste in a very satisfying way. Additives such as fish bone, fish blood, Growmore, and other products can work in place of compost too. These can get you started while your own composting efforts get established.
Rotating Crops
It might be tempting to keep the same great layout each year, but different crops take different nutrients from the soil, and moving them around year to year gives the soil time to replenish. This practice ensures that you will maximise your yield, and keep your soil from degrading.
There are plenty of guides on which plants use which nutrients – and even which ones can help replenish certain substances – so a little self-education in this area is easily gained. Here is a basic guide to get you started. Rotate between these groups for each area, year by year.
Plant brassicas (cabbage, cauliflower, broccoli, sprouts) where you had potatoes last year. Plant legumes (peas and beans) where you had brassicas last year. Plant root vegetables (carrots, parsnips, radishes) where you had legumes last year. And finally, plant potatoes where you had your (other) root vegetables last year. This cycles goes on and on and can keep your allotment producing well.
Is it Worth Getting An Allotment?
Caring for your allotment takes time and labour, but it is worth it in several ways. Once established, you’ll be getting your veg at a fraction of what it would cost you in the shops, it will taste better, be fresher, and come with the deep satisfaction that you have produced it yourself. Add to that the health benefits of the exercise, fresh air, sunshine and community, and it’s easy to see why allotment keepers are a dedicated bunch.
Things won’t always run perfectly, but if you keep at it, the highs will heavily outweigh the lows.
General Rules & Regulations for Allotments in the UK
Allotments come with rules, and often with (optional) meetings to attend. If you don’t go to the meetings, it’s always good to find out what was said, so that you don’t miss information. If you do go, you’ll find it’s a great way to meet others in your allotment area, to share peculiar aspects of your allotment area, and to make new friends.
Allotments are a tradition in the UK, and one that shows no sign of fading away. In fact, allotments are getting more and more popular. They are a great way to save some money, increase health, and gain a sense of community. It’s easy to see why so many people want to take part.
You can shop allotment greenhouses here.
 Author: